Ploughing is the oldest job in tillage, yet it is still the one where most mistakes are made. In the same field, with the same tractor and the same plough, one farmer leaves neatly turned furrows of even depth while another struggles with a machine that pulls to one side, a wavy furrow bottom and soil that is only half turned. Almost all of the difference comes down to set-up and working method.
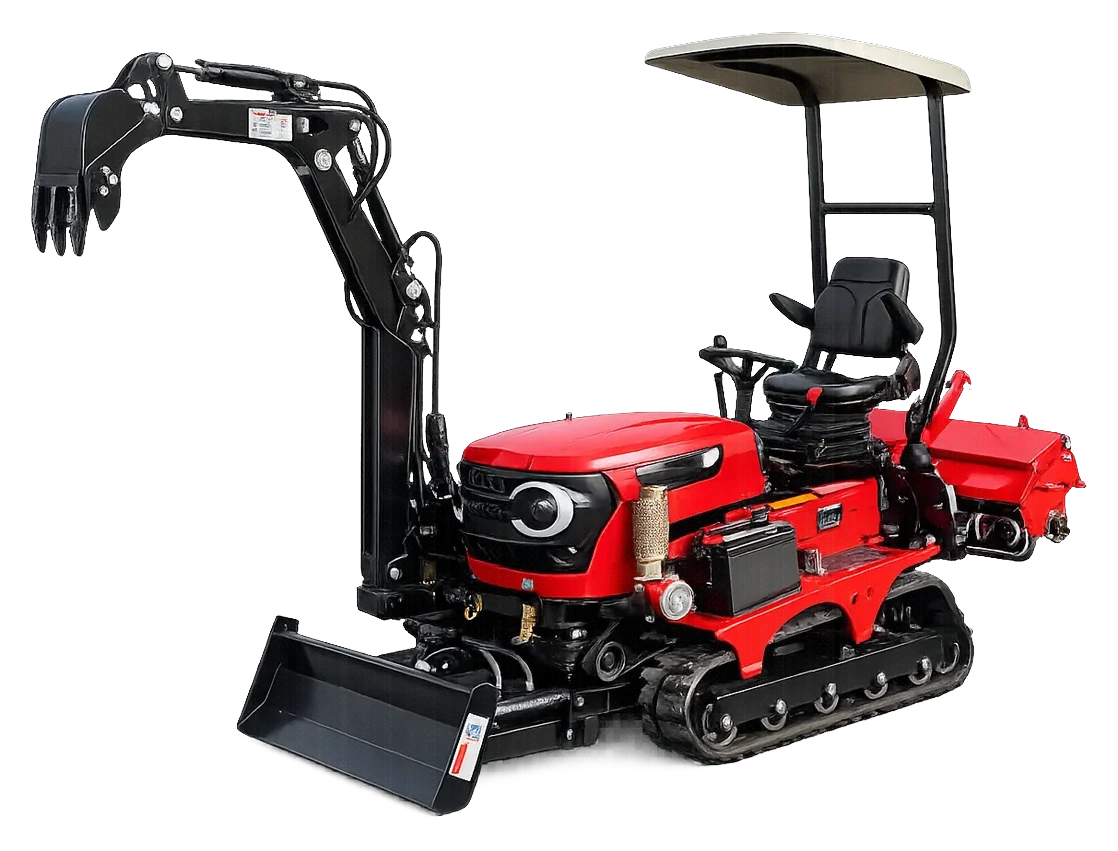
In this guide we cover the parts of a two-furrow plough, the adjustments to make before you go out into the field, how to open the first furrow, the ploughing pattern and fixes for the most common problems. Throughout, we use the 35 HP QD35 tracked tractor as the example machine. For the adjustment methods for your plough and tractor, their own operator’s manuals are always the reference.
When do you need a plough, and when don’t you?
A plough cuts, lifts and turns the soil. This buries crop residue, weeds and manure from the surface and brings the soil from below up to the top. A plough is usually the right tool in these situations:
- Soil that has gone uncultivated for a long time, grassed over or turned into grassland. A rotary tiller struggles on this kind of ground; turning it over with a plough first makes the job easier.
- Heavy crop residue and weeds. Turning the soil moves the residue and weed seeds away from the surface.
- Working farmyard manure in deep.
Let’s be honest — you don’t need to plough every year. In well-structured garden soil that is worked regularly, deep ploughing every season wastes fuel and time and needlessly exposes the soil’s moisture and organic matter. In soil like this a rotary tiller is often enough; we explain the difference between the two attachments in our guide to soil preparation with a rotavator.
Get to know your two-furrow plough
On a two-furrow plough, the two bodies are mounted one behind the other and offset to the side. Each body is made up of the same parts, and the setting of each one has a direct effect on the result:
- Share: The part that cuts the soil horizontally and wears the most. A blunt share makes it harder for the plough to enter the soil and increases the draught required.
- Mouldboard: The curved surface that lifts the cut strip of soil and turns it over to the side. If its surface is rusty or caked with mud, the soil sticks instead of sliding off.
- Sole and landside: The parts of the body that bear against the furrow bottom and the furrow wall; they steady the plough and keep it running straight.
- Frame and hitch: The frame that carries the bodies, and the part that attaches to the tractor. Our attachment range includes a plough extension bar alongside the two-furrow plough; set up your hitch arrangement as shown to you at delivery.
Both bodies should do an equal share of the work: they should both cut at the same depth and the same width. Almost every adjustment is there to achieve this balance.
Before you go out into the field: set-up checklist
Most adjustments are made on flat, firm ground, such as the yard. Only fine-tuning should be left for the field:
- Linkage: Are the pins, linch pins and bolts in place and tight? Play in the linkage makes the depth wander in the field.
- Shares: Are the shares on both bodies sound and at a similar level of wear? If one is blunt, that body will work shallow.
- Mouldboard surfaces: Have rust and dried mud been cleaned off? A plough that was greased and stored over the winter should be run a little slower for the first few rounds, until the mouldboards are polished.
- Cross-level (left–right): With the machine on flat ground, does the plough lean when you look at it from behind? The shares of both bodies should touch the ground at the same height.
- Fore-and-aft level (front–rear): Viewed from the side, is the plough set so that the front and rear bodies work at the same depth? This angle is set with the adjuster in the linkage; follow the method in the manual.
- Alignment: Is the plough hitched in line with the tractor’s line of pull? A misaligned plough constantly pulls the tractor to one side.
- Depth: Have you decided on the target depth and made the initial setting?
- Field: Have stone heaps, old stakes, irrigation pipes and cables been marked?
Check the set-up in the field: the 50-metre test
Setting up in the yard is only a start; the real test is in the field. Plough about 50 metres, stop and check these four questions:
- Are the strips of soil turned by the two bodies the same width?
- Are the furrows cut by the front and rear bodies the same depth?
- Is the furrow wall clean and the furrow bottom flat?
- Does the tractor run straight without constant steering corrections?
If you spot a problem, change just one setting at a time and repeat the test. If you change three settings at once, you can’t tell which one did the trick.
The first furrow sets up the rest of the field
The first furrow is the reference for all the ploughing. A crooked first furrow means crooked furrows right across the field.
- Mark it out: Put a pole or flag at each end of the field and, if possible, a third marker on the same line. While ploughing, keep your eyes on the marker opposite, not on the soil in front of you.
- Set aside the headland: At both ends of the field, leave a strip wide enough for the machine to turn comfortably with the plough, and mark its boundary with a line. Lift and lower the plough on this line, and plough the headland last.
- Balance the opening: Running the plough slightly shallower than normal on the first pass and at normal depth on the way back gives a neater ridge at the opening. Find the method that works best with your own plough by trying it out in the first field.
Ploughing pattern: gathering or casting?
With a one-way (conventional) plough, there are two basic patterns for ploughing a field:
- Ploughing from the centre outwards (gathering): You open the first furrow in the middle of the field and work outwards, going round it. The soil collects in the middle and a ridge forms in the centre of the field.
- Ploughing from the edges inwards (casting): You start at the edges of the field and work inwards. The soil is thrown towards the edges and an open furrow is left in the middle.
Using the same pattern every year makes the ridge and the open furrow keep growing in the same place. Alternating the two patterns from year to year keeps the field surface even. In large fields, dividing the land into several strips and ploughing each one separately cuts down on running empty and on long turns at the headland.
Turns cost both time and fuel. Ploughing along the long side is usually more efficient than along the short side, because you cover the same area with fewer turns. Once the rest of the field is finished, plough the headland with one or two rounds along the edge of the field. Lift the plough to turn at the corners; making sharp turns with the plough in the ground strains the bodies and the linkage and leaves patches in the corner that are unworked or worked twice. Take a look at our guide to fuel efficiency in tracked tractors too, where we cover losses like these in detail.
Depth and speed: steady, sensible, unforced
Good ploughing is measured by a flat furrow bottom and the same depth from start to finish. Stop now and then while ploughing and measure the depth in the furrow; do this several times, especially in the first few rounds.
When choosing the depth, balance three things: what the soil needs, the tractor’s pulling power and fuel. Ploughing deeper than necessary quickly increases the draught required, makes the tracks slip and pushes up fuel use per decare. Ploughing at the same depth every year can also contribute to a compacted plough pan forming at that level; vary the depth slightly from year to year.
A simple calculation: A decare is 1,000 m². Running the plough just 5 cm deeper means about 50 m³ of extra soil being cut and turned on every decare. The tractor has to move that extra soil again on every decare, and fuel and time rise accordingly. Choose the depth according to what the soil really needs, not “just in case”.
When it comes to speed, the golden rule is that the soil should flow smoothly over the mouldboard and turn:
- Too slow: The soil rises on the mouldboard but doesn’t turn fully and falls back into the furrow.
- Too fast: The soil is thrown about, the depth wanders, and the plough and linkage take knocks.
The QD35’s gearbox has 3 forward gears and 1 reverse, which the high/low range selection extends to 8 speeds; low range is generally preferred for ploughing. Find the right gear by watching how the soil turns: plough a short distance, stop and look behind you.
Troubleshooting table
| Symptom | Possible cause | What to do? |
|---|---|---|
| Plough won’t go into the soil, stays shallow | Blunt share, wrong fore-and-aft angle, very dry and hard soil | Replace the share, correct the angle, wait for the soil to become workable if necessary |
| Bodies working at different depths | Cross-level or fore-and-aft level out of adjustment | Reset the levelling on flat ground |
| Tractor pulls to one side, hard to drive straight | Plough hitched out of line with the line of pull | Adjust the hitch alignment as shown in the manual |
| Soil doesn’t turn, slides off in a block | Wet soil, speed too low, rusty or caked mouldboard | Wait until the soil is workable, go up a gear, clean the mouldboard surface |
| Wavy furrow bottom, depth wanders | Speed too high, play in the linkage, uneven ground | Slow down, check the pins and bushings |
| Tracks slipping | Too deep, wet soil | Reduce the depth; don’t persist in wet soil |
| Stalks and residue blocking the plough | Long, unchopped crop residue | Mow and chop the residue before ploughing |
Ploughing stony and sloping ground
In a stony field, every time a plough body hits a stone, both the plough and the linkage take a knock. Collect or mark known large stones in advance and slow down in those areas. After a hard impact, stop and check the share, the bolts and the frame; carrying on with a bent part only makes the damage worse.
On sloping ground the plough exerts a side force on the tractor and tries to pull the machine down the slope; this force grows as the depth increases. On a slope, reduce the depth and work slowly in a low gear; don’t use the plough at all on steep sections. Turning the soil downhill is easier for the machine, but soil that is turned downhill every year gradually moves to the lower part of the slope, and the soil layer at the top grows thinner. That is why limiting ploughing on sloping plots to the years when it is really needed also protects the soil. We set out the rules of machine safety on slopes in detail in our guide to using a tracked tractor on muddy and sloping ground.
When the ploughing season is over, clean the plough, protect the mouldboard surfaces and shares with a thin coat of oil and store it somewhere dry. You’ll find the end-of-season jobs for the tractor itself in our tracked tractor maintenance checklist.
Summary
- A plough is the right tool on soil that has gone uncultivated for a long time and carries heavy residue; on regularly worked soil it isn’t needed every year.
- The aim of the adjustments is for both bodies to cut at the same depth and width: cross-level, fore-and-aft level and alignment.
- Open a straight first furrow using markers; set aside the headland and plough it last.
- Alternate between gathering and casting from year to year.
- Keep the depth steady and sensible, and choose a speed at which the soil turns smoothly.
- Most problems with pulling to one side, staying shallow or not turning the soil can be solved by adjustment.
You can see the two-furrow plough, the plough extension bar and other equipment on our tracked tractor attachments page, and check the tractor’s specifications on the QD35 tracked tractor page. For current attachment prices and the plough set-up that suits your field, message us on WhatsApp.