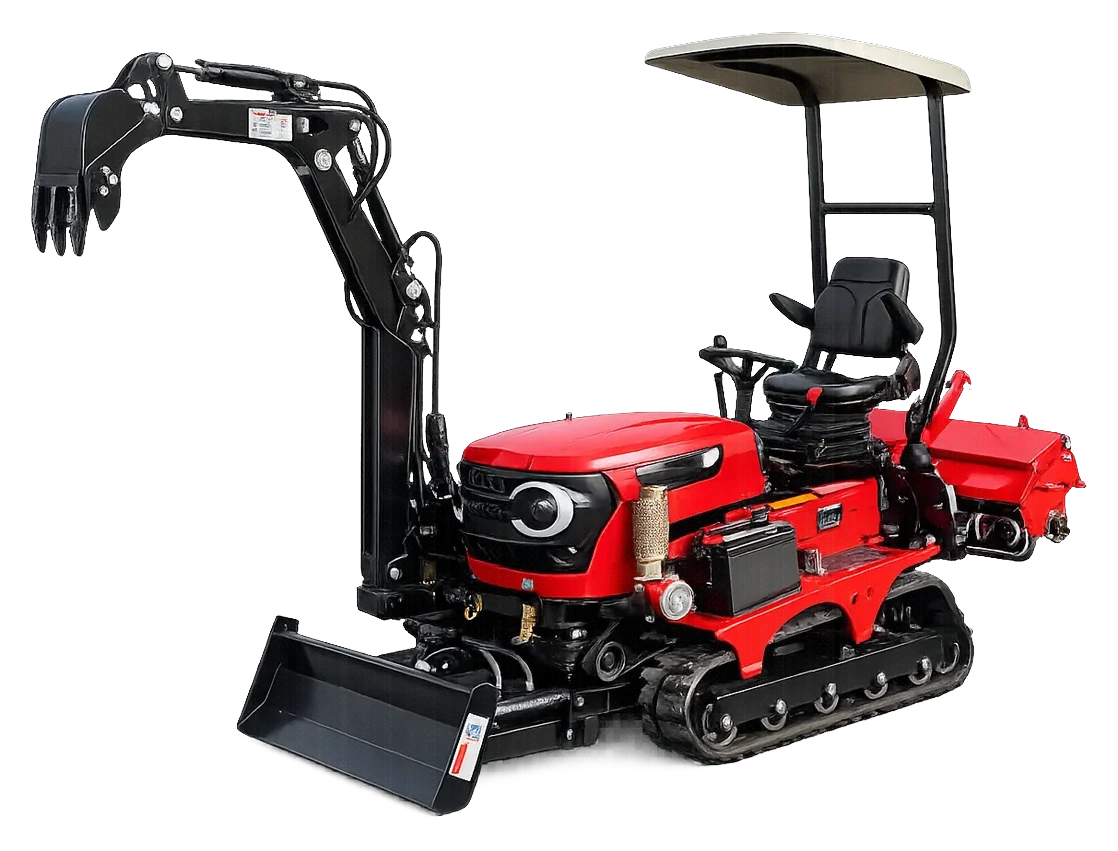
Most expensive breakdowns on a tracked tractor start with a small oversight: straw clogging the front of the radiator, a crack in a belt that nobody noticed, a track left slack. None of these will stop the machine in a day, but they will stop it in the busiest week of the season. The same list also covers the maintenance of tracked garden tractors used in vineyards and orchards.
This guide brings daily, weekly and seasonal maintenance together into one routine for a compact tracked tractor like the QD35, with a single-cylinder, water-cooled diesel engine and a belt drive. You can print the list and keep it next to the machine.
Important: for oil types, change intervals and settings, your machine’s operator’s manual is what counts. This guide explains what to check and how often; take the numerical values from the manual.
Before you set up a maintenance schedule: the manual, the hours and a logbook
The first maintenance tool is a logbook. Write down the date of every working day, how many hours you worked, what job you did and any maintenance carried out. If the machine has an hour meter, note its reading; if not, add up the working hours from the logbook. The maintenance intervals in the manual are mostly given in working hours; if you don’t know the hours, you can’t keep to the intervals.
The second benefit of the logbook is the warranty. At EKSFORK, machines come with a warranty of 2 years or 2,000 working hours, and a regular maintenance record is the strongest evidence that the machine has been used correctly if a fault occurs. We cover the habits that keep your warranty valid separately in our guide to machine warranties.
If you are starting with a new machine, the first working hours need special care; on most new engines the first oil change is due earlier than the normal interval. We go through this period step by step in our guide to running in a new machine.
Also put together a maintenance kit and keep it next to the machine or in your vehicle. A check that gets put off in the field because something is missing often never gets done:
- Grease gun and grease of the type given in the manual
- Engine oil of the type given in the manual, for topping up
- Clean rags, a funnel and a clean fuel can with a cap
- Spare fuel filter, air filter and belt
- Torch, gloves and a basic set of spanners
- Maintenance logbook and pen
Keep the funnel and can clean when refuelling. Dust and water getting into the tank are the biggest enemies of a diesel fuel system.
Daily checks: the first and last 10 minutes of every working day
Before starting the engine
With the machine on level ground and the engine cold, go through the checks in this order:
- Engine oil: Pull out the dipstick, wipe it, put it back in and read it. The level should be between the two marks. If the oil is going down faster than usual, make a note; it is a symptom.
- Coolant: Check the level in the expansion tank or the radiator. Never open the radiator cap while the engine is hot; hot water under pressure causes burns.
- Radiator core: Has straw, grass, fluff or mud built up in front of it? In farm work, a clogged radiator core is one of the main reasons engines overheat.
- Fuel: Is there enough fuel for the day’s work? The QD35’s tank holds 16 litres. If you see water in the fuel pre-filter or water separator, drain it.
- Air filter: Has dust built up in the pre-cleaner, and if there is a restriction indicator, has it turned red?
- Belts: Do the visible belts show cracks, broken fibres, oil on them or slackness?
- Tracks: Are there stones, branches or wire caught in the tracks? Does the track look too slack or overly tight?
- Leaks: Are there oil, fuel or water stains where the machine stood overnight?
- Fixings: Are the attachment pins, linch pins and visible bolts in place? Vibration from a single-cylinder engine can loosen fixings over time.
- Guards: Are the belt guards and the guards over rotating parts in place and secure? Don’t work without guards.
When the job is done
- Don’t switch off an engine straight away after it has worked under load for a long time; let it idle for a short while to cool down.
- Lower the attachment to the ground and park the machine on level ground.
- Clear the worst of the dirt from the front of the radiator and inside the tracks; don’t skip this step after muddy jobs.
- Write down in the logbook any unusual noise, smell or warning you noticed during the day. By the next morning it will be forgotten.
Weekly checks
Once a week, or more often in the busy season, add these checks:
- Belt tension and wear: Press on the belt with your thumb and check how much it gives; compare this with the manual. A shiny (glazed) surface, frayed edges and cracks are signs that it needs replacing.
- Air filter element: In dusty work, take the element out and inspect it. Paper elements are not washed; if the manual allows, they are cleaned with low-pressure air from the inside out, and replaced if torn or deformed.
- Deep-cleaning the radiator: Clean out the fine dust trapped in the core without flattening the fins.
- Battery: Are the terminals corroded or loose? Cable connections should be tight and clean.
- Greasing: Grease the points specified in the manual with a clean grease gun; pump until you see the old grease come out, then wipe off the excess.
- Attachment wear parts: Rotary tiller blades, plough share points and their bolts. Working with missing or broken blades spoils the work and makes the attachment run unbalanced.
- Gearbox and other oil levels: Check the levels at the check points shown in the manual.
We explain why grease points matter so much, and how to prevent play before it develops, in our guide to pins, bushings and greasing.
The track system: where the most expensive wear hides
In the QD35’s track system, the drive sprocket, five rollers, top roller and tensioner work together. These parts wear together; neglecting one shortens the life of the others too.
Tension: neither too tight nor too slack
Track tension is usually checked on the upper side, by the amount of sag between two support points. Take the measurement on a cleaned track with the machine on level ground, and compare the value with the manual.
- Track too tight: Puts constant load on the sprocket, roller and tensioner bearings; it speeds up wear, wastes engine power and increases fuel consumption.
- Track too slack: Leads to the track coming off on turns and slopes, and to the sprocket skipping teeth on the track.
Signs of wear
- If the drive sprocket’s teeth have become pointed or hook-shaped, the sprocket is nearing the end of its life.
- A roller that catches, wobbles or leaks oil when turned by hand needs replacing.
- Uneven wear on the inside of the track is a sign of misalignment or a faulty roller.
We look at sprocket, roller and idler wear in detail, using a mini excavator as the example, in our guide to undercarriage wear; the principles are the same on a tracked tractor. On a tractor, though, the cheapest protection is to clean the tracks at the end of muddy and stony days.
Belt drive and gearbox
The QD35 is belt-driven and works with a fully geared mechanical gearbox with a dual clutch. The advantage of a belt system is its simplicity; maintenance is simple too, but it doesn’t tolerate neglect.
- Signs of slipping: A whistling noise under load, the machine losing power or a shine on the belt. If this happens, check the tension; a belt that keeps slipping soon overheats and fails.
- Oil and belts don’t mix: Oil or fuel splashed onto a belt causes slipping and damages the rubber. Find and fix the source, and clean or replace the belt.
- Replace as a set: If several belts share the same pulley, they are usually replaced as a set; a new belt and an old one don’t share the load evenly.
- Go easy on the clutch: Working for long periods with the clutch half engaged wears it out quickly. Bring the machine to a complete stop before changing direction.
- Don’t force the gears: If gear changes on the mechanical gearbox are stiff, have someone check whether the clutch is disengaging fully.
Seasonal maintenance: end of season and start of season
At the end of the season, before putting the machine away
- Thorough cleaning: Mud, manure and plant debris hold moisture and speed up corrosion. Clean the machine and attachments thoroughly and let them dry.
- Oil change: If you have reached or are close to the interval in the manual, change the engine oil at the end of the season; you don’t want dirty oil sitting in the machine for months.
- Antifreeze: On a water-cooled engine, the coolant’s frost protection must be checked before winter. Frozen water can crack the engine block and the radiator.
- Fuel: Leaving the tank full generally reduces the water that forms in it through condensation. For long-term storage, follow the recommendation in the manual.
- Battery: Disconnect it or keep it fully charged; a battery left flat is damaged by the cold.
- Rust protection: Protect bare metal, such as rotary tiller blades and plough surfaces, with a thin film of oil; grease all the grease points.
- Storage place: A covered, dry and level area. Seal the exhaust and air intake against moisture and animals, and tie a note to the steering so you don’t forget.
If the machine will stand for more than a few months, follow the storage and restarting steps in our guide to leaving a machine idle for a long time.
At the start of the season, before the first job
- Check all fluid levels; remove the covers and notes you added for storage.
- Inspect belts and hoses for ageing; rubber that has been standing hardens and cracks.
- Check the air filter and the radiator; animals may have nested in them over the winter.
- Start the engine and let it warm up at idle for a while, watching for leaks and unusual noises.
- On the first day, try the machine on a light job before putting it under full load.
Maintenance schedule: a summary in one table
| Frequency | Check / task | Note |
|---|---|---|
| Every day, before starting | Engine oil, coolant, front of the radiator, fuel, air filter, belts, tracks, leaks, fixings | On level ground, with the engine cold |
| Every day, after work | Clean radiator and inside of tracks, attachment lowered, notes in the logbook | Don’t skip after muddy or straw-heavy jobs |
| Weekly | Belt tension, air filter element, battery, grease points, attachment blades, oil levels | More often in the busy season |
| At the hour intervals in the manual | Engine oil and filter, fuel filter, air filter element, gearbox oil | First change earlier on most new machines |
| End of season | Cleaning, oil change, antifreeze, fuel, battery, rust protection, storage | Somewhere covered and dry |
| Start of season | Fluids, belts and hoses, trial run | Light work before full load |
We explain in detail which filter is changed when, and why genuine filters matter, in our guide to filters on construction machines.
Summary
- The first maintenance tool is the logbook: date, working hours, job and maintenance carried out.
- Every morning, 10 minutes: oil, coolant, front of the radiator, fuel, filter, belts, tracks, leaks, fixings.
- Every week: belt tension, filter element, battery, greasing and attachment blades.
- Track tension should be neither too tight nor too slack; take the value from the manual.
- Check the antifreeze before winter; on a water-cooled engine, freezing is one of the most expensive oversights.
- For numerical values, the operator’s manual always takes priority.
If you would like periodic servicing done by an authorised service centre, you can fill in the service request form or call our technical service line (0552 947 92 09). The machine’s technical specifications are on the QD35 tracked tractor page; if you get stuck on anything during maintenance, message our service line on WhatsApp with a photo.