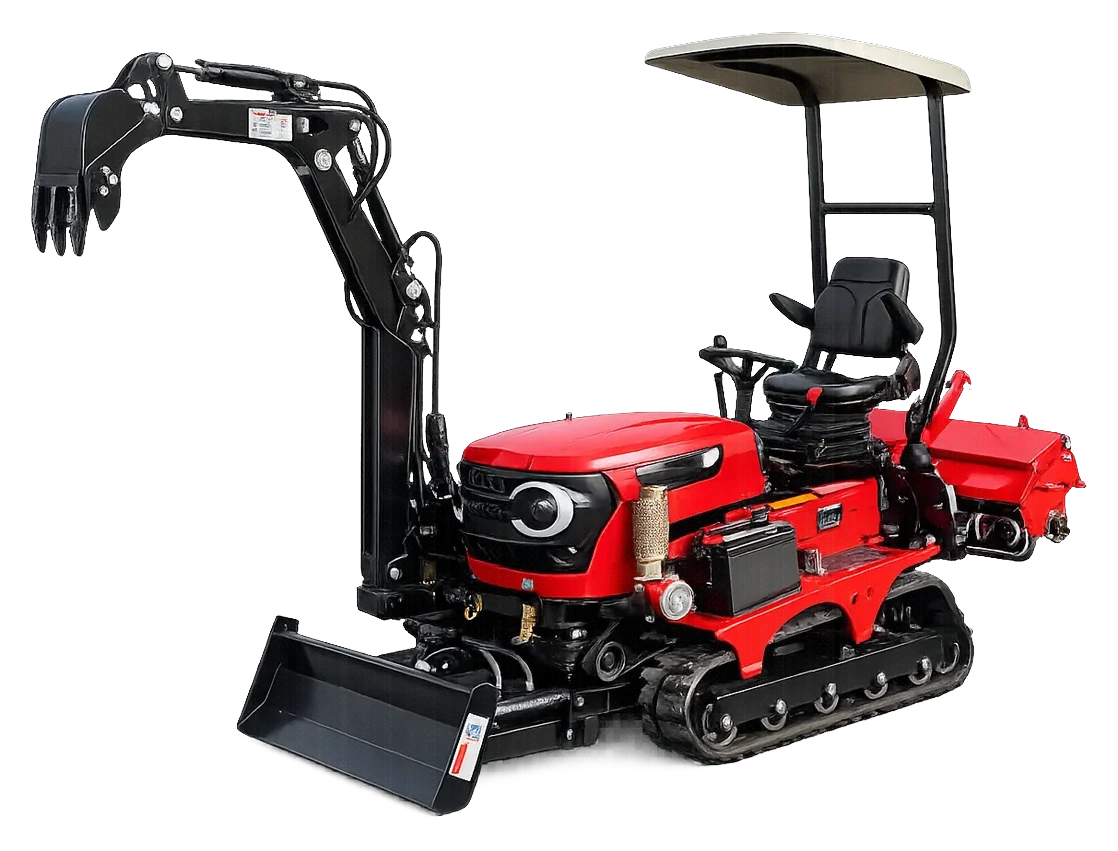
The rotavator, or rotary tiller, is the small farm’s favourite attachment: in a single pass it breaks up the soil, mixes it and leaves it ready for sowing. But it is also the attachment that is most often used wrongly. A rotary tiller worked at the wrong time, at the wrong speed or with more passes than necessary leaves soil that looks good today but crusts over after a few rains, with a hard pan formed underneath.
In this guide we explain soil preparation with a rotary tiller through three settings: timing, depth and speed. Our examples use the 35 HP QD35 tracked tractor; the principles apply to other small tractors too. For your rotavator’s adjustment ranges and safety rules, its own operator’s manual is always the reference.
What a rotary tiller can and can’t do
A rotary tiller slices, breaks up and mixes the soil with blades mounted on a rotating shaft. That makes it very effective at mixing crop residue and manure into the soil, breaking up clods and preparing a seedbed.
Let’s be honest — it can’t do every job:
- It isn’t a deep loosening tool. Most rotary tillers work at shallow to medium depth. Breaking up soil that is compacted deep down calls for a plough or a different method.
- It struggles on very hard, grassed-over ground. On soil that has gone uncultivated for years and turned into grassland, it is usually more efficient to plough first and then go over it with the tiller; we cover this in our ploughing guide.
- Overdoing it does harm. Turning the soil to dust isn’t good work; it is a loss of soil structure. A surface worked as fine as flour turns to mud in the first downpour and sets into a hard crust once it dries; this crust makes it harder for germinating seedlings to break through and slows water soaking into the soil.
Timing 1: is the soil fit to work?
The most important rotary tiller setting isn’t on the tractor but in the field: soil moisture. The same machine with the same settings prepares a perfect seedbed in soil at the right moisture, yet turns wet soil into paste.
To judge the moisture, drop a spadeful of soil onto the ground from waist height:
- If it breaks into small pieces, the moisture is right; the tiller will crumble the soil easily.
- If it lands in a lump, flattens out and smears on the spade, the soil is too wet. In this state the tiller blades smear the soil, an impermeable pan forms just below the working depth and the clods set as hard as stone once they dry.
- If it raises dust and the large, hard clods don’t break, the soil is too dry. The tiller then burns a lot of fuel, the blades wear quickly and you are left with a powdery surface.
The workability window by soil type
The workability window, in other words the period when the soil is fit to work, varies a great deal with soil type:
- Sandy soil becomes workable quickly after rain and can be worked over a wide moisture range. But if it is overworked it loses its organic matter fast, and in dry spells the surface blows away in the wind. Working sandy soil less often and less deeply is usually the better approach.
- Loam is the easiest soil to work; its workable moisture range is wide and preparing a good seedbed with a rotary tiller is easy.
- Clay soil has the narrowest window. It smears when wet and its clods harden when dry. To catch the right day on a clay field, check the soil every day; sometimes the window stays open for only a few days.
Holding off when the field is wet is hard, but waiting a day or two is cheaper than battling compacted soil all season. We look at working machines on wet and sloping ground separately in our guide to using a tracked tractor on muddy and sloping ground.
Timing 2: how long before sowing?
Where the rotary tiller fits into the sowing calendar depends on the job in hand:
- Mixing in crop residue and green manure: Residues take time to break down in the soil. Do this job earlier rather than right before sowing, so they have time to decompose; how long that takes depends on the amount of residue, the soil moisture and the temperature.
- Farmyard manure and compost: Working it in straight after spreading stops the manure drying out on the surface and losing its value.
- Seedbed: Make the final pass close to sowing. A seedbed prepared too early can crust over in the rain and gives weeds a head start.
- Stale seedbed: On plots with heavy weed pressure, prepare the seedbed early and wait for the first flush of weeds, then destroy them with a shallow pass and sow. That way part of the weed seed is used up before sowing.
Depth: how deep, how shallow?
The right depth depends on what you are trying to achieve. The general principle is: don’t go deeper than the job requires. Every extra centimetre means more fuel, slower progress and more blade wear.
- For a seedbed, the aim is to leave the top layer, which the seed will be in contact with, fine and the layer beneath it slightly coarser. A seedbed worked too deep and too fine slumps in the rain.
- For mixing in residue and manure you work deeper; the aim is to bury the residue in the soil without it concentrating in a single layer.
- In hard soil, trying to go deep in a single pass strains the machine and the blades. Make the first pass shallow and the second at the target depth.
Don’t keep the depth at the same level every year. Blades turning at the same depth season after season can contribute to a compacted pan forming at exactly that level. Varying the depth slightly from year to year reduces this risk.
How do you set and measure the depth?
On most rotavators the depth is set with the side skids or a depth wheel, together with the tractor’s linkage settings. After setting it, work 20–30 metres, stop and measure at several points across the worked strip with a stick or a ruler. If the two ends of the rotavator are working at different depths, the attachment isn’t level; adjust the linkage.
Speed: forward speed, rotor and rear flap
Three things decide how finely the soil is worked: the tractor’s forward speed, the rotor’s rotation speed and the position of the rear flap.
- Slow forward speed + fast rotor: The blades cut the same soil more often, so the surface becomes finer.
- Fast forward speed: The clods stay larger and fuel consumption per decare falls, but the finish is coarser.
- Rear flap closed and low: Thrown soil hits the flap and breaks up again, leaving a levelled surface.
- Rear flap open: The soil stays coarser and looser, and less crop residue wraps around the rotor.
The QD35 has 3 forward gears and 1 reverse, which with the high/low range gives 8 speeds in total. Low range is generally used for tilling. The engine’s rated speed is 2,200 rpm; when tilling, keep the engine at the working speed recommended in the manual and handle heavy load by changing down a gear, not by letting the revs drop. The way to find the right gear is to experiment: work a short strip, look back at the size of the clods and change by one step if necessary.
If the field has tall weeds or long crop residue, consider mowing and chopping it before tilling. Long stalks wrap around the rotor, the tiller has to be stopped and cleared again and again, and the residue doesn’t mix into the soil properly.
How to set up a rotavator: settings by purpose
| Purpose / soil condition | Depth | Forward speed | Rear flap | Passes |
|---|---|---|---|---|
| Seedbed for fine seed | Shallow | Slow | Closed, low | 1, plus a light second if needed |
| Planting seedlings and saplings | Medium | Medium | Half open | 1 |
| Crop residue, green manure | Medium to deep | Slow to medium | Open | 1–2 |
| Mixing in farmyard manure | Medium | Medium | Half open | 1 |
| Hard, compacted soil | Shallow first, then target depth | Slow | Open | 2 |
| Wet, smearing soil | Don’t work it | — | — | Wait until it is workable |
The values in the table are a starting point; fine-tune them on your own soil with a short test strip.
Working pattern in the field
- Start at the edge and leave the headland until last. Leave room to turn at the ends of the rows and work this area last, with one or two passes along the field.
- Overlap slightly. On each pass, run a little over the edge of the previous strip; narrow unworked strips lead to weeds coming up and uneven germination.
- Lift the attachment when turning. Turning with the tiller in the ground strains the blades, the shaft and the drive train. Lift the attachment before the turn and lower it slowly once you are driving straight again.
- Lower the tiller into the soil while it is turning. Burying a stationary tiller in the soil and only then starting it strains the drive train.
- Between the rows in vineyards and orchards, watch out for tree roots and drip lines; we have gathered the tricks of working between the rows in our guide to vineyard and orchard work with the QD35.
According to the specification table, the QD35 covers about 2 decares an hour and uses 1–2 litres of fuel per decare. These figures vary with soil hardness, depth and the number of passes. Example (hypothetical figures): a single pass over a 10-decare plot means about 5 hours of pure working time at the capacity in the table; giving the same plot a second pass out of habit roughly doubles the time and the fuel. Run the numbers for your own area, and look at the size of the clods to decide whether a second pass is really needed. Unnecessary depth and extra passes are the main reasons consumption climbs to the top of the range; you’ll find the details in our guide to fuel efficiency in tracked tractors.
Blades, stones and safety
Rotary tiller blades are consumables. In stony soil they wear faster, bend or break.
- Check before every job: Are any blades missing, broken or bent? Are the bolts tight?
- Keep the pattern: The blades are arranged on the shaft in a set order and direction. When replacing them, take a photo before removing the old ones and fit the new ones in the same pattern; a wrong arrangement unbalances the load.
- Replace them as a set: Mixing badly worn blades with new ones makes the working depth uneven.
- Clear wrapped weeds with the engine off: If weeds, string or wire wrap around the rotor, stop the engine, take out the key and keep your hands away until you are sure the rotor has come to a complete stop.
- Keep everyone clear: Stones and soil can be thrown out behind a working tiller. Keep children and animals away from the work area.
- Keep the guards in place: Never work with the drive train or rotor guards removed.
For rotary tillers and other attachments, see our tracked tractor attachments page; we give current prices for blades and attachments on WhatsApp.
Quick checklist
- I checked the moisture with the spade test; the soil isn’t smearing or dusty.
- I have decided on my aim: a seedbed, mixing in residue or working in manure?
- I set the depth to suit the aim, measured it on a test strip, and the attachment is working level.
- I chose the gear and the rear flap position according to clod size.
- Blades complete, bolts tight, guards in place.
- I lift the attachment on turns, and I don’t make more passes than necessary.
You can check the specifications of the QD35 tracked tractor, which takes a rotary tiller, on its product page. To talk about which attachment set-up suits your soil or to get a current price, message us on WhatsApp.