Most forklift faults don’t appear all at once; they first show themselves as a small drip, a little play or an unusual noise. A short check at the start of the shift is the cheapest way to catch these signs while the machine is parked rather than under load.
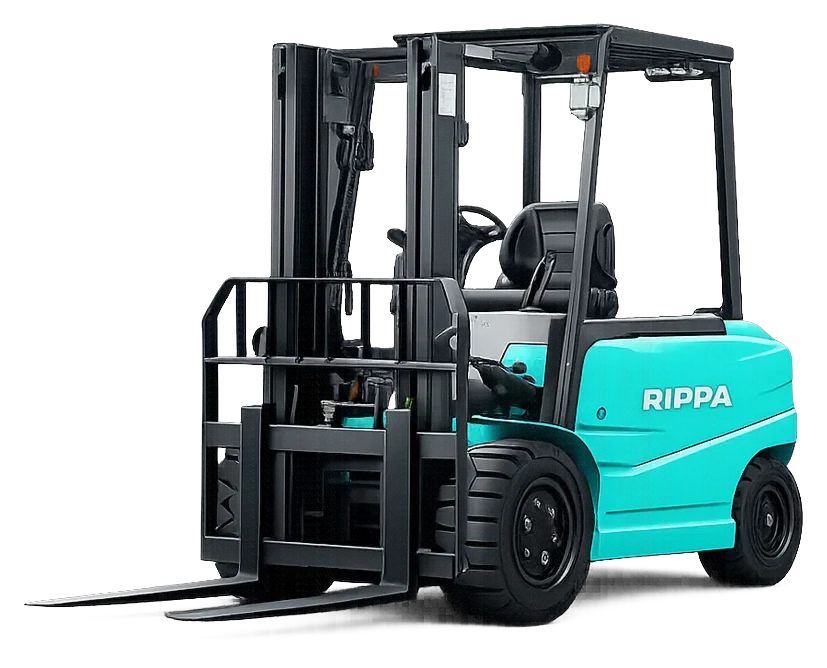
In this guide we turn the daily check into a 10-minute routine: we explain step by step in which order to look, what is normal and what is a warning sign at each point, and how to decide when you spot a fault. The examples are based on the electric Rippa RF20E; on diesel machines, engine checks are added to these.
The daily check is not maintenance; it is an “is it sound?” test the operator carries out with their eyes, ears and hands. Jobs that require measurement, adjustment or repair are for the service provider.
Why at the start of every shift?
During the previous shift the forklift may have been used by another operator, scraped a rack or dropped into a pothole. The start-of-shift check does three jobs:
- Safety: You find out that the brakes, steering, chains or forks have a problem while the machine is stationary, not with the load in the air.
- Cost: A small hose leak caught early is a simple repair; left unnoticed, it can take the pump, a cylinder or a load down with it.
- Accountability: A signed form records the condition in which the machine started the shift. There is no more argument about when the damage happened.
The start-of-shift check is one of the cornerstones of forklift safety in a business. We describe the other parts of the system in our forklift safety guide.
Habits that make the check worthless
- Filling in forms in bulk: A form filled in after the fact at the end of the shift or the week isn’t a check, it’s paperwork.
- Saying “it was like that yesterday”: Play or a leak that grows a little every day gradually starts to look normal. The way to spot the change is to look at the records from previous days.
- Just glancing: You can’t judge the brakes, steering and lift without doing the function tests.
- Not writing down small findings: A finding that isn’t written down can’t be followed up; the next operator has to discover the same problem from scratch.
- Giving in to dispatch pressure: An urgent load is never a reason to use a faulty machine. The weight of this decision shouldn’t be left to the operator; the manager must stand behind it.
Preparation: before you start the check
- Park the machine in a level, well-lit area, with the forks on the floor and the parking brake applied.
- Put on your personal protective equipment, such as safety shoes and gloves.
- Have the check form or digital list ready; fill in the machine number, date and shift.
- Clear away any materials that stop you walking round the machine.
- If the machine is on charge, first switch off the charger, unplug it and hang the cable up; never start the check with the charging cable connected.
The first part of the check is done with the machine switched off. Finishing the visual check before switching on is safer and keeps you from working near moving parts.
Tailor the form to your own machine
A ready-made form template is enough to get started, but the most useful form is one laid out for your machine and your walk-around route. List the lines in the order you walk round the machine, add equipment fitted to the machine, such as a side shifter and fork positioner, as separate lines, and next to each line write a short description of what “normal” looks like. Keep the form on the machine, somewhere easy to reach and protected from water.
Minutes 1–4: a walk round the machine
Start at the front of the machine and walk round clockwise. Know what each point “should” look like; only then will a difference catch your eye.
- Forks: Are there cracks, bending, curled tips or wear at the heel (the bend of the fork)? Are both forks level, and are their fastenings in place?
- Load backrest and carriage: Are any parts broken, bent or missing? Are there oil traces around the side shifter and fork positioner?
- Mast chains: Are both chains equally tensioned? Is there rust, dryness, a broken link or a loose anchor bolt?
- Mast and hoses: Are there wet patches or drips on the cylinders, hoses and fittings? Are there chafe marks around the hose pulleys?
- Floor: Is there a new oil stain where the machine was parked? If so, look for the source.
- Tyres and rims: Are there missing chunks, deep cuts, metal or glass embedded in the tread, cracked rims or missing wheel nuts?
- Overhead guard and body: Is there bending, breakage or a fresh impact mark?
- Battery and charging socket: Is the battery cover in place, and is the cable insulation intact? Is there blackening, melting or looseness in the socket? Is there swelling, liquid, a sharp smell or abnormal heat on the battery side?
- Labels and visibility: Is the capacity plate legible? Are the mirror, headlight and beacon lenses clean and intact?
If something catches your eye during the walk-around, take a photo with your phone. It is the quickest record, both for noting on the form and for showing the service technician if needed.
Minutes 5–7: seated checks
Climb onto the machine using three points of contact: always keep two hands and one foot, or two feet and one hand, on the machine. Once seated, check the following:
- Seat and seat belt: Is the seat secure and adjusted, and does the belt lock and retract properly?
- Gauges: Switch on; check the battery level and look for any error codes or warning lights. Write the hour meter reading on the form.
- Steering: With the machine stationary, is there abnormal play or stiffness in the steering?
- Pedals: Do the accelerator and brake pedals move freely and return? Is there anything underneath that could jam a pedal?
- Hydraulic levers: Do the lift, tilt, side shifter and fork positioner levers move freely and return to neutral when released?
Minutes 8–9: function tests
Make sure nobody is nearby and carry out the tests in an empty, open area:
- Do the horn, lights, beacon and reversing alarm work?
- Service brake: Move off at low speed and brake; the machine should stop in a short distance and in a straight line, without pulling to one side.
- Parking brake: Does the machine stay put with the brake applied?
- Steering: Turn it fully in both directions; there should be no sticking, noise or stiffening.
- Lifting and lowering: Raise and lower the forks a few times. The movement should be smooth and quiet, with soft transitions between mast stages. If the ceiling and surroundings allow, test up to the height specified in the manual.
- Tilt: Tilt the mast forwards and back; the movement should be smooth in both directions.
- Side shifter and fork positioner: Shift the carriage both ways and open and close the forks; both forks should move evenly.
- Creep: Raise the forks slightly and wait a while; they should not lower by themselves.
If you notice an unusual noise, smell or vibration during the tests, note it down. We have collected what these symptoms can point to in our fault symptoms on construction machines guide.
Minute 10: record and decide
The last minute is easily skipped, but it is the most important step: writing down the result of the check and making a decision.
- Tick every line on the form; a line left blank means that point wasn’t checked.
- Write down the hour meter reading and the battery level.
- State your decision clearly: fit for use or do not use.
- Sign the form and leave it in the designated place.
If the machine must not be used, there is no room for “it’ll do”. Take the key, hang a visible “DO NOT USE” tag on the machine, tell the shift supervisor and report the fault with photos. Opening a ticket via the service request form and describing the fault with photos and video speeds up the fix.
Shift handover
If the machine is being handed over to the next shift, give a short verbal handover alongside the form. Information such as an odd noise noticed during the day, a function that struggled or a low battery tells the new operator what to look at more carefully during their check. Hand the machine over with the forks on the floor, the parking brake applied and the battery status known.
Check table: what to look at, and what to do when you find a fault
| Check point | Normal | Warning sign | Decision |
|---|---|---|---|
| Forks | Straight, no cracks, level | Cracks, bending, curled tips | ❌ Do not use |
| Chains | Evenly tensioned, lubricated | One side slack, rust, broken link | ❌ Do not use |
| Hydraulics | Dry hoses and cylinders | Dripping, wet fittings, oil on the floor | If actively leaking, ❌ do not use |
| Tyres | Undamaged, no foreign objects | Chunking, deep cuts, tread down to the wear line | Report it; ❌ if badly damaged |
| Brakes | Stops short and straight | Long stopping distance, pulls to one side | ❌ Do not use |
| Steering | No play, smooth | Stiffness, play, noise | ❌ Do not use |
| Horn, lights, alarms | All working | One not working | Report it; ❌ in areas with pedestrians |
| Battery and socket | Clean, intact, normal temperature | Swelling, smell, melted socket | ❌ Do not use, do not charge |
| Lifting | Smooth, no creep | Lowers by itself, knocking | ❌ Do not use |
| Seat belt | Locks, retracts | Doesn’t lock, torn | ❌ Do not use |
The decisions in the table are a general framework; go by your business’s rules and your machine’s user manual. If in doubt, don’t use the machine — ask.
Decide in advance which findings stop the machine and which fall under “report and monitor”; settle this distinction with your health and safety adviser and your service provider. That way there is no argument at the moment of decision, and the operator doesn’t carry the responsibility alone.
What the daily check doesn’t cover: weekly and periodic jobs
The daily check doesn’t cover everything, and it shouldn’t; the aim of the 10 minutes is a quick safety scan. The following jobs are done at longer intervals and mostly by the service provider:
- Lubrication: Mast slides, chains and pivots are lubricated at the intervals given in the manual.
- Measurements: Chain stretch, fork wear and brake adjustment need measuring.
- Battery maintenance: Measuring block voltages and checking that connections are tight; details are in our forklift battery guide.
- Tyre monitoring: We give the steps of the detailed weekly tyre check in our forklift tyres guide.
- Periodic inspections: Inspection of lifting equipment by competent people at set intervals. Confirm how often and by whom with your health and safety adviser.
For managers: checking the check
Forms being filled in doesn’t mean the check was done. The shift supervisor should occasionally compare the form with the actual condition, at the machine. A weekly review of the forms also reveals recurring findings: a cylinder marked “slight leak” every day is where the next breakdown will come from. Finally, make sure every reported fault has actually been fixed and closed on the form; the more operators see that the problems they report get solved, the more seriously they take the check.
Summary
- The daily check catches faults while the machine is parked, not with the load in the air.
- The order is always the same: preparation, walk-around with the machine off, seated checks, function tests, record.
- With fork, chain, brake, steering, lift or battery problems, the machine is not used.
- The key of a faulty machine is removed, the machine is tagged and the fault is reported.
- The daily check doesn’t replace maintenance; plan the periodic jobs separately.
You can find the RF20E’s technical data on the product page; if you spot a fault during the check, message our technical service line on WhatsApp with a photo.