Rainwater pooling in the garden, damp seeping through a basement wall, a corner of a field where the mud never dries out… Most of these have the same solution: a drainage line that collects the water and carries it away on the right gradient. Running a water pipe to the garden, connecting a building to the sewer or laying an irrigation main calls for the same thing: a narrow, neat trench at the right depth.
A mini excavator is practically made for these jobs: it digs a narrow trench, stockpiles the spoil neatly and does the backfill. But in drainage and pipe work, success is decided not by digging speed but by the gradient of the base and the quality of the fill. A line dug quickly but with the wrong gradient holds water instead of carrying it away.
In this guide we take you step by step through the whole job, from planning the route and gradient to choosing the bucket, and from the pipe bedding and backfill to the test before the line is covered.
First define the job: which line, and what for?
Drainage and pipe laying share the same digging technique, but the expectations differ. Before you start, be clear about the type of line; the depth, width and fill material all depend on it:
- Surface water drainage: Collects rainwater that pools in a garden or yard and carries it away. It is usually a shallow line with perforated pipe and gravel fill.
- Foundation drainage: Runs around the outside of a building’s foundations and collects the water that reaches the wall. Its depth is set by the foundation level, and it should be planned in line with the plans and together with the person responsible for the structure.
- Field drainage: Collects excess water from wet areas; it needs long runs and an unbroken gradient.
- Pressurised water and irrigation mains: Depth and pipe protection matter more than gradient; frost risk and loads from above are taken into account.
- Foul water and rainwater connections: Because they flow by gravity, the gradient is critical; the connection point and the necessary permits must be agreed with the relevant authority in advance.
If corrugated conduit is being laid for an electric cable, the machine can do the digging; pulling the cable and making the connections, however, are the responsibility of a qualified electrician.
Route and gradient plan: the most important job before digging
In any gravity line, water only flows downhill. So first decide where the water will go, in other words the discharge point, and plan the line backwards from there. The discharge point must be the lowest level on the line; otherwise the water will sit inside it.
The gradient calculation is simple: level difference = line length × gradient. The gradient required depends on the type and diameter of the pipe and the purpose of the line; check the pipe manufacturer’s recommendation or your project.
Example (illustrative figures): If you choose a 1% gradient for a 25-metre drainage line, there must be a level difference of 25 × 0.01 = 0.25 metres, or 25 cm, between the start and the end of the line. If the trench is 50 cm deep at the start, it will be at least 75 cm deep at the end. If the ground itself slopes, this difference shrinks or grows, so always measure the levels on site.
Levels can be measured with a laser level, an optical level or, on short runs, a water level made from a clear hose. Driving a peg every few metres along the route and writing the target depth on it makes the operator’s job much easier and speeds up checking afterwards.
Mini excavators for drainage digging: choosing the bucket and the machine
Trench width is the pipe diameter plus the space needed on both sides of the pipe to place and compact the fill. A bucket wider than necessary removes more soil, needs more fill material and makes the job take longer. A bucket narrower than necessary makes it harder to place the pipe and fill along its sides.
| Job | Recommended bucket | Note |
|---|---|---|
| Drip irrigation and small hose lines | 20 cm bucket | Little spoil, minimal damage to the garden |
| Small-diameter drainage and water pipes | 30 cm bucket | A popular size for garden drainage |
| Medium-diameter pipe, gravel-filled drains | 40 cm bucket | Comfortable room for fill beside the pipe |
| Wide trenches, hard and stony ground | 60 cm digging bucket | When several pipes are laid side by side |
| Levelling the base and the backfill | 100 cm grading bucket | Its straight edge leaves a clean, ripple-free surface |
To choose the bucket size for your job in detail, see our bucket width guide. On the machine side, depth and access are what count:
- R10 (1.2 t): With a maximum digging depth of 1,650 mm and a width of 930 mm, it is enough for garden drainage, irrigation lines and work in narrow yards. Because it is light, it does less damage to lawns and garden ground.
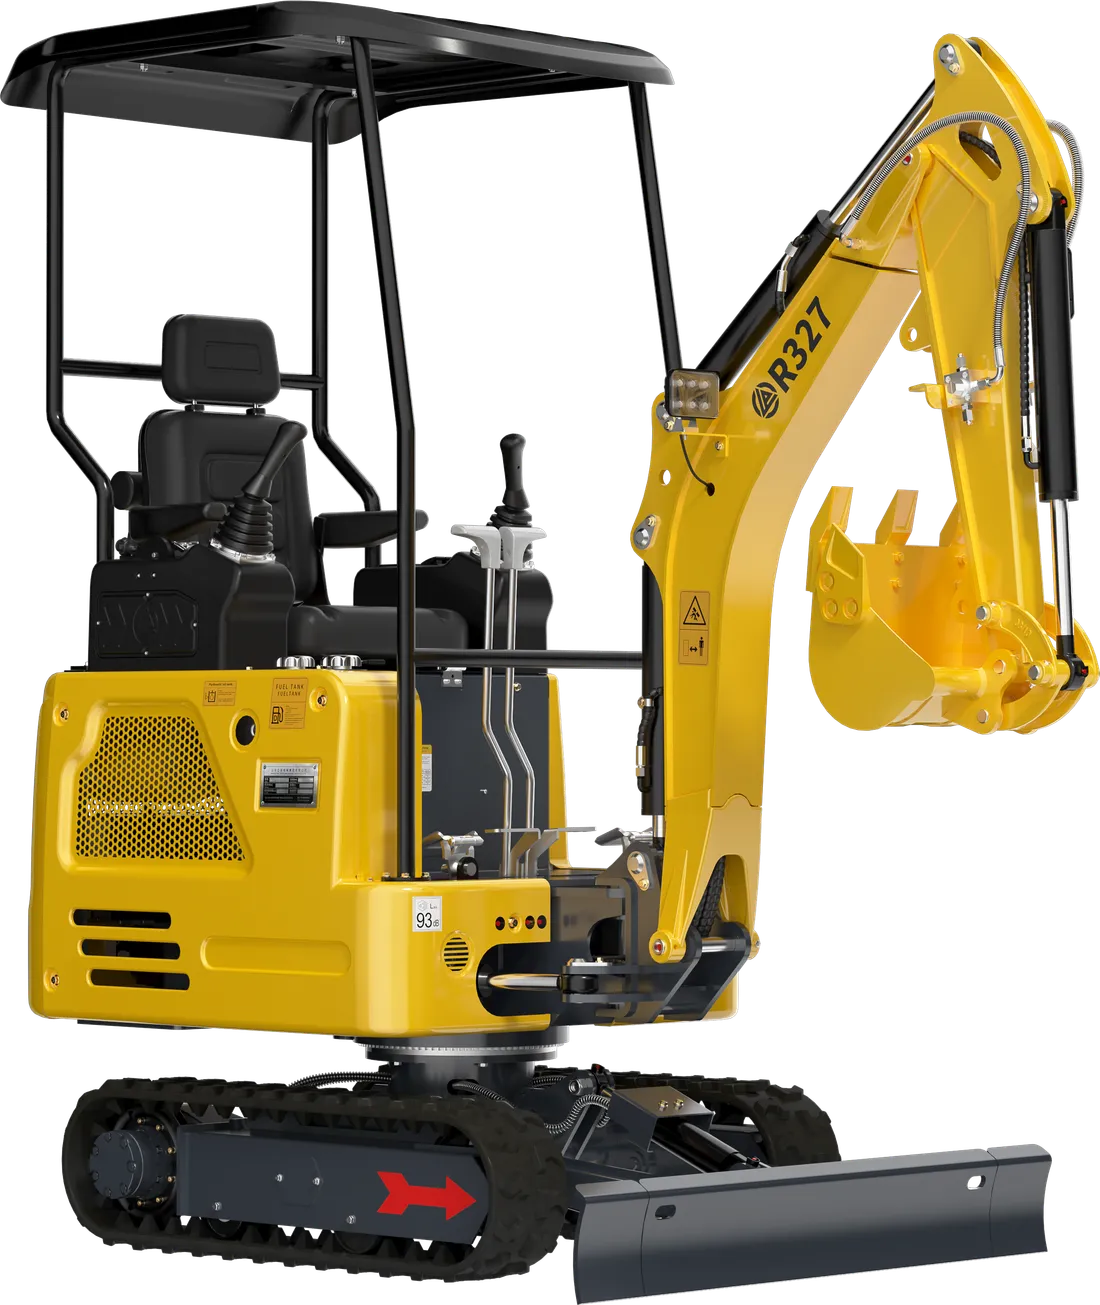
- R327 (1.7 t): Thanks to its 120° boom swing, it can dig a trench right along a wall while the machine stays parallel to it, which makes foundation drainage much easier. Its digging depth (1,580 mm) is close to the R10’s; what sets the R327 apart is not depth but access along walls. We explain this feature in our guide to boom swing.
- R350 (3.5 t): With a maximum digging depth of 2,927 mm and a digging radius of 5,007 mm, it suits deeper and longer utility lines.
Trench digging technique: a flat base and the right gradient
In a drainage or pipe trench, the goal is not a deep hole but a neat base with a constant gradient. A few practical rules for that:
- Line the machine up with the trench. In most cases the machine sits on the trench centre line and digs as it reverses, so it never has to drive over the trench it has just dug.
- Pile the spoil on one side. Keep the heap a little back from the trench edge; a heap close to the edge both loads it and lets soil run back into the trench. Leave the other side clear for the pipe and materials.
- Stockpile the topsoil separately. In gardens and fields, if you keep the fertile topsoil apart from the subsoil, the surface returns to its former state more quickly after backfilling.
- Take the last few centimetres carefully. As you approach the base level, only part-fill the bucket and take thin layers. Filling an over-dug base with loose soil makes the pipe settle later on.
- Trim the base by scraping. Drawing the bucket edge along parallel to the base leaves it free of ripples. If this is hard with a toothed bucket, switch to a bucket with a straight cutting edge.
- Measure often. Check the depth every few metres with a straightedge and tape measure or with a level. Fixing a mistake spotted early takes minutes.
We cover decisions on battering and shoring at different depths in detail in our channel and trench digging guide; in this guide we look at the trench only from the drainage and pipe point of view.
Extra care at foundations and in wet weather
In foundation drainage, taking the trench below the underside of the foundation can loosen the ground the foundation sits on. The depth should be set by the person responsible for the structure; along long walls, the trench should be opened and closed section by section rather than dug end to end in one go.
In wet periods, water filling the trench ruins the base and bedding you have prepared. Only open as much trench as you can close the same day, pump out any water that collects and clean out a muddy base before laying the pipe.
Bedding, pipe and filter: the layers that decide how long the line lasts
The pipe is never laid straight onto the dug soil. For the line to work trouble-free for many years, the layers must go in in the right order. In a typical drainage line the order is as follows; the exact materials and thicknesses are set by your project or the pipe manufacturer.
- Filter fabric (geotextile): Stops fine soil from working its way into the gravel and the pipe over time. It is laid over the base and sides of the trench and folded over the top once the fill is finished.
- Bedding: A thin layer of gravel or sand is spread over the base and levelled to the gradient. The pipe must sit fully on this bedding, with no voids underneath.
- Pipe: Perforated pipe is used for drainage and solid pipe for pressure lines. Joints are made according to the manufacturer’s instructions.
- Side and top fill: In drainage, the pipe is surrounded with washed gravel; in a pressure line, it is wrapped in fine, stone-free material.
- Inspection points: On long runs, at changes of direction and at junctions, fitting inspection chambers makes cleaning and inspection possible later on.
Lowering the pipe into the trench with the machine may look practical, but using the machine to lift loads depends on the conditions in the operator’s manual. Light pipes should be placed by hand, and nobody should be in the trench while the machine is moving.
Backfill and compaction
Backfilling is the part of the job people most want to finish quickly, yet it causes the most problems. Careless backfill sinks a few months later, the line of the trench shows up on the surface, and it can even damage the pipe.
- Cover the pipe with fine material first. Large stones in the first soil the machine tips in can strike the pipe.
- Backfill in layers. Compact each layer before tipping the next. A trench filled in one go settles over time.
- Use the dozer blade. For pushing the heaped soil back into the trench, the blade is quicker than the bucket. The R10 has a 100 cm dozer blade and the R350 a 120 cm one.
- Don’t drive the tracks over a shallow pipe. If the cover over the pipe isn’t thick enough, the weight of the machine can crush the pipe or disturb its bedding.
- Leave a slight mound on grassed areas. A small mound left as a settlement allowance reduces sinking marks later on. Under roads and buildings, compaction requirements are set by the project.
Trench safety: short but non-negotiable rules
Narrow, deep trenches are more dangerous than they look. A trench edge can collapse without warning, especially after rain, in filled ground and when there is a load on the edge.
- Before digging, get information from the relevant utilities about electricity, gas, water and telecoms lines; near these lines, dig by hand and with care.
- Nobody should enter a deep trench that has not been battered back or shored. Decide with your health and safety adviser which measures your ground needs at which depth.
- Keep the machine and the spoil heap away from the trench edge.
- Tape off any trench left open, and mark it clearly at night.
- Hard hats, safety boots and high-visibility vests apply to everyone on site.
We have gathered the general rules everyone on site should know in our site safety guide.
Testing, records and handover
Make sure the line works before it is covered; finding a fault afterwards means opening the trench again.
- Flow test: Run water in at the start of the drainage line and check that it flows out freely at the discharge point. If the water ponds and sits at any point, the gradient is wrong there.
- Pressure test: On pressure lines, the test is carried out using the method recommended by the pipe and fittings manufacturer.
- Records: Mark the route, the depth and the inspection chamber locations on a dimensioned sketch, and take photos. For anyone digging in the same area years later, this sketch is invaluable.
Quick checklist
- Line type, discharge point and required gradient decided
- Levels measured, depth pegs set out along the route
- Underground services checked with the utilities, trench safety planned
- Bucket width chosen for the pipe diameter and fill space
- Base dug neat and to gradient, measured frequently
- Filter fabric, bedding, pipe and fill placed in the right order
- Backfill done in layers, no tracking over shallow pipe
- Flow or pressure test done, line recorded on a sketch
For tight-space jobs such as garden drainage and irrigation lines, take a look at the R10; for deeper lines you can compare all our mini excavator models. Send us the length and depth of your line on WhatsApp and we’ll work out the right machine and bucket combination together.