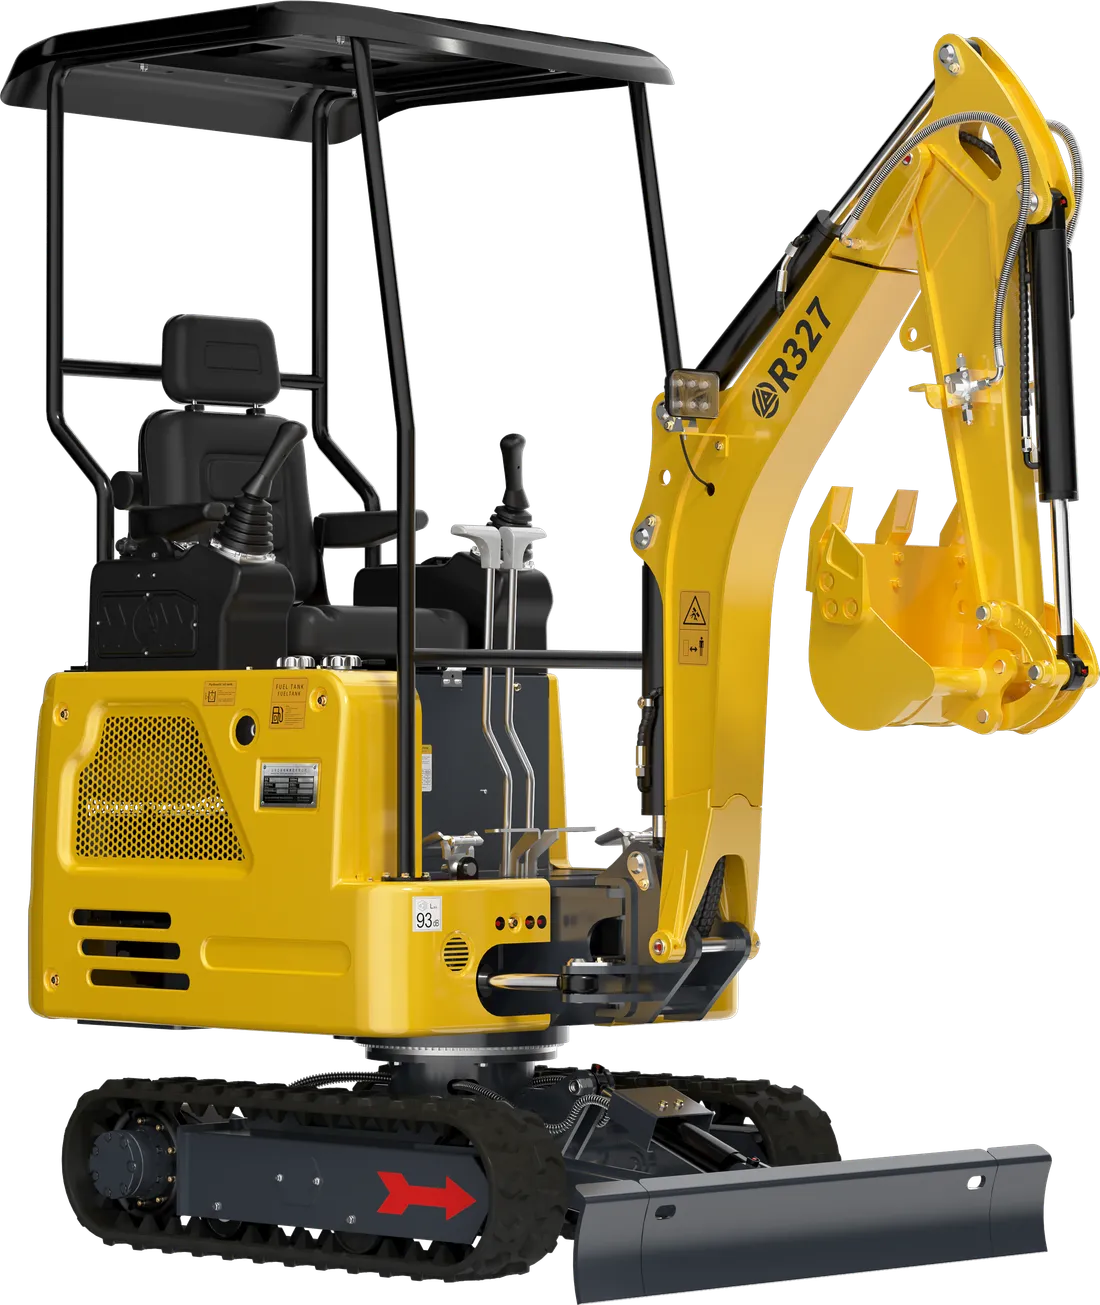
You researched for months, made your decision, paid, and now the machine is at your door. At this point most buyers excitedly get straight to work. Yet delivery day is the day you can most easily sort out any problem with the machine: the seller, the haulier and the person giving the training are all there, the machine is at zero hours and everything can be put on record.
A scratch missed at delivery, a missing accessory or a wrongly recorded serial number can come back to haunt you months later in a warranty claim or when you sell the machine second-hand. So don’t treat the handover as a moment to sign and move on, but as a short, systematic inspection.
In this guide you’ll find a checklist that works through everything in order, from preparing before delivery to the documents, and from the visual inspection to the start-up test and training. You can print it out and keep it with you on delivery day.
Before delivery: get the site and the team ready
The checklist starts before the machine arrives. For the delivery to go smoothly, settle the following a few days in advance:
- Access: Let us know in advance whether the delivery vehicle can get all the way to the site, and whether there are narrow streets, low underpasses, a steep entrance or soft ground.
- Unloading area: Set aside a flat, firm area with no obstacles around it. There must be no people, vehicles or overhead lines in the direction the machine will come off.
- Who will be there: The person who will operate the machine must be present at delivery; the basic operator training is given to them.
- Timing: Choose a time when you won’t be in a hurry. The checks and the training take time; when a delivery is squeezed in just before dark, everything gets rushed.
- List of questions: Write down your questions in advance; plenty of questions get forgotten in the bustle of the handover.
- Fuel and the first job: Ask in advance how much fuel will be in the tank on arrival, and have fuel ready in a suitable can for the first working day. It is also a good idea to plan a short trial job after the training rather than putting the machine straight onto the real work.
We describe the whole ordering, shipping and handover process in our guide to delivery across all 81 provinces. EKSFORK delivers to all 81 provinces, villages included, and provides set-up and basic operator training on delivery.
Safety during unloading, and transport damage
Unloading the machine from the delivery vehicle is the riskiest part of the delivery. It should be done by someone experienced, with the surrounding area cleared.
- Check that the ramps sit firmly on the vehicle and that the tracks are centred on the ramps.
- Nobody should stand beside the ramps or in front of the machine during unloading.
- Once the machine is off, look at the points touched by the tie-down chains and straps: paint rubbed by a strap, or a hose or cover the chain has rested against.
If there is any damage from transport, photograph it while the haulier is still there and have it noted on the delivery documents. A damage claim made later is much harder to resolve.
Documents: finish the paperwork on site
When receiving the documents, check not only that they are all there, but also that they are consistent with each other and with the machine:
| Document / information | What to check |
|---|---|
| Invoice | Are the model, buyer details and amount correct? Is the machine’s serial number shown? |
| Machine serial number | Does the number on the type plate match the one on the invoice and the warranty certificate? |
| Engine serial number | Has the number on the engine been recorded? It also comes in handy when ordering spare parts. |
| Warranty certificate | Are the start date, the term (2 years or 2,000 operating hours) and the conditions stated? |
| CE certificate | Does the machine carry the CE marking, and has the declaration of conformity been handed over? |
| Operation and maintenance manual | Did it come with the machine? Which page covers the service intervals and oil types? |
| Handover report | Have the machine, the list of attachments and accessories, the hour meter reading and any notes been entered? |
An inconsistency in the serial number looks like a small typo, but in warranty and spare parts matters the correct number is everything. We explain what the CE marking means in our guide to CE marking.
Visual inspection: a walk around the machine
Before starting the machine, walk slowly all the way round it. To avoid missing anything, always go in the same order: front attachment, boom and arm, upper structure, cab or canopy, rear covers, undercarriage.
- Bucket and attachments: Are the teeth, pins and retaining parts in place? Have all the attachments you ordered arrived?
- Boom, arm and cylinders: Are there any scratches, dents or oil marks on the cylinder rods? A scratch on a rod surface can later turn into a seal leak.
- Hydraulic hoses and fittings: Are there any crushed sections, chafe marks, kinks or leaks? Do the hoses move freely without rubbing against anything?
- Body and paint: If there are dents, scratches or paint damage, photograph them and have them written into the report.
- Cab or canopy: Are the windows, door lock, seat, seat belt and mirrors in good order?
- Undercarriage: Are there any cuts or tears in the tracks, oil leaks from the rollers or damage to the drive sprocket?
- Dozer blade: Is the blade edge straight, and are its cylinder and mountings sound?
- Under the machine: Are there any drops of oil, fuel or coolant where the machine is standing?
Take a photo of each section as you go round. These photos are both a record of any damage and a reference for comparing a hose, a cylinder rod or a track months later with how it looked on day one.
Fluids and level indicators
On a new machine the fluids should be full, but a cap can work loose or a connection can start leaking during transport. Do the check with the engine cold and the machine on level ground:
- Engine oil: Is the level on the dipstick between the two marks?
- Coolant: The Kubota D722 in the R327 and the Kubota D1703 in the R350 are water-cooled; the level in the expansion tank should be between the marks. Never open the radiator cap while the engine is hot.
- Hydraulic oil: With the machine in the position described in the manual, does the level gauge show the correct level? The position of the boom and bucket changes the reading.
- Fuel: Is there enough fuel in the tank for the start-up test? The R327’s fuel tank holds 10 litres; plan your fuel for the first working day accordingly.
- Grease points: Can you see grease on the pins? Make sure you learn where the grease nipples are, and the daily greasing routine, during the training.
Start-up test: try every function one by one
After the visual inspection, start the machine together with the person giving the training. The aim is not to push the machine hard but to see that every function works and there are no abnormal signs.
- Starting and gauges: Does the engine start easily? Do the warning lights go out once it is running? Is the hour meter counting?
- Idling: Let the engine idle for a few minutes; there should be no irregular noise, excessive vibration or dark smoke.
- Safety lock: Check that the hydraulic functions are disabled when you put the control safety lever in the locked position. This mechanism prevents unintended movement when getting on and off the machine.
- Boom, arm and bucket: Try each movement slowly and through its full stroke. The movements should be smooth and at an even speed, without sticking.
- Slewing: Slew the upper structure in both directions; there should be no noise or sticking.
- Boom swing: On the R327 and R350, try the 120° boom swing in both directions.
- Travel: Try forwards, reverse and turns on level ground; the machine should not pull to one side when travelling straight.
- Dozer blade and tracks: Lower and raise the blade; on the R327, check that the telescopic tracks extend and retract.
- Thumb and auxiliary lines: Check that the hydraulic thumb opens and closes, and that any auxiliary line for a breaker or auger works.
- Walk-round after the test: Stop the engine and, after a few minutes, look again at the hose connections and under the machine. Leaks often only show up after the system has been working under pressure.
Which signs mean you should stop the handover and make a note?
If a new machine shows any of the following signs, discuss it there and then with the person handing it over, and make sure it is written into the report:
- A warning light that doesn’t go out after the engine starts
- A hydraulic function that doesn’t work at all or is noticeably slow
- Oil dripping from a fitting, hose or cylinder
- Metallic knocking, grinding or squealing when slewing or travelling
- The machine pulling to one side when travelling on level ground
Some of these signs can have a cause as simple as a connection that worked loose in transport, and can be fixed on the spot. What matters is that the problem isn’t ignored, and that how and when it will be fixed is agreed in writing.
Getting the most out of the basic operator training
Whether the training at delivery turns into nothing more than a short demonstration is largely up to you. Ask about these topics and have your operator try them out in person:
- The daily walk-round check: which points are checked, and in what order?
- Grease points and the daily greasing routine
- Refuelling and the daily checks on the fuel system
- Emergency stop, the safety lever and getting on and off the machine safely
- Transport position: how is the machine loaded onto a trailer and secured?
- Limits for lifting and for working on slopes
- Who to call in the event of a fault, and what information to have ready
Training is only a start. For people using the machine for the first time, we recommend reading our first-use guide together after the training. Health and safety legislation requires operators to be trained; check the current certification and training requirements with your health and safety adviser.
Handover report, warranty and first service
When the checks are finished, put everything in writing. A carefully prepared handover record is the strongest document you have throughout the warranty period.
- Hour meter reading: Write the operating hours at handover into the report and photograph the meter. Because the warranty runs for 2 years or 2,000 operating hours, it is important that the starting figure is clear; the details of the conditions are set out in your warranty certificate.
- Photos: Take and keep dated photos of all four sides of the machine, the type plate and any damaged areas.
- Shortcomings and notes: If a part is to be sent later or something needs to be put right, make sure it is clearly written into the report.
- First service: Find out at how many hours and where the first service will be carried out, and put it in your calendar. You can find the rules for the running-in period in our running-in guide.
- Contact: Save the technical service line (0552 947 92 09) in your phone; you can also open a request using the service request form.
As the last job on delivery day, start a machine file: keep the invoice, warranty certificate, CE certificate, handover report and photos in a single folder, with copies on your phone. Add a simple service logbook; at every service, write down the date, the hour meter reading, the work done and the oil and filters used. A well-kept logbook builds confidence both when you make a warranty claim and, later on, with the buyer when you sell the machine.
We describe the day-to-day habits that keep your warranty valid in detail in our warranty guide.
Quick checklist
- Access and unloading area ready, operator present at delivery
- Transport damage checked while the haulier was there
- Invoice, serial number, warranty certificate, CE certificate and manual matched
- Visual walk-round inspection of the machine done
- Engine oil, coolant, hydraulic oil and fuel checked
- All hydraulic functions, travel and the safety lock tested
- Leak check carried out after the test
- Daily checks, greasing, transport and emergency steps practised in training
- Hour meter reading, photos and notes entered in the report
- First service date and service line saved
If you are still choosing a machine, you can take a look at our mini excavator models. Send us your questions about delivery on WhatsApp and we’ll plan delivery day together.